
If you have ever watched a freshly laid floor start sounding hollow after a few months, you already know that tiles rarely fail because of the tile itself. They fail because of what sits underneath. Choosing the right Tile Adhesive in Delhi is one of those quiet decisions that decides whether a floor lasts two years or twenty, and yet it is usually made in a hurry, on the advice of whoever happens to be standing at the shop counter.
This guide is written for homeowners planning a renovation, contractors who want fewer callbacks, and builders who need to keep material cost under control. We will look at why Delhi is a tough city for tiling, how polymer adhesive compares with the old sand-cement method, what to check before you buy, how much material you will really need, and how to apply it step by step. Nothing here is complicated, but a few small details make a very big difference.
Why Delhi is hard on tiled surfaces
Delhi does not go easy on buildings. Summer afternoons regularly cross 40°C, and a terrace or balcony surface can get much hotter than the air around it. A few weeks later the monsoon arrives, and the same surface is soaked, dried and soaked again. Winter adds cold nights, fog and dampness. The tile and the bed beneath it expand and contract at different rates through all of this, and the bond between them has to survive every single cycle.
Then there is the way buildings are made here. A large part of the city is brick masonry with cement plaster, and renovations in older colonies often mean tiling over uneven walls or even over existing tiles. Newer apartment projects use concrete slabs, gypsum board partitions and big-format vitrified tiles, which are heavier and far less forgiving of a weak bond. One adhesive has to cope with many different surfaces, which is why people who work in the trade look for a flexible, polymer-based product instead of a plain cement mix.
Sand-cement method vs polymer based tile adhesive
For decades, tiles in this country were fixed with a thick bed of sand and cement mixed on site. It is cheap on paper and every mason knows how to do it, so it is easy to see why it stuck around. But the method has real weaknesses. The mix ratio changes from one batch to the next depending on who is mixing. The bed is thick, so it dries unevenly and the tile can sit on air pockets. It also needs curing with water, which is not always practical on upper floors or in a rush to finish.
A polymer based tile adhesive works differently. It is a factory-made blend of cement, silica and special polymers, so every bag behaves the same way. You apply it in a thin, even bed of about 3 mm with a notched trowel, which means less material, less weight on the slab and far fewer hollow spots. The polymers add flexibility, so the bond can absorb small movements in the structure without cracking. For large vitrified tiles in particular, a thin-bed polymer adhesive is now the standard choice among professionals, not a luxury.
What to check before you buy tile adhesive in Delhi
Walk into any building material market and you will see a dozen brands in similar bags at very different prices. Price alone tells you very little. Here is what is worth checking before you place an order.
- The type of tile you are fixing. Ceramic, vitrified, natural stone, quarry tile and pavers all have different weights and water absorption. Make sure the adhesive is meant for your tile type.
- Where it will be used. An interior bedroom floor is a very different job from a bathroom wall, a balcony or a swimming pool. Confirm that the product is rated for exterior and wet areas if you need that.
- The surface underneath. Concrete, cement plaster, brick masonry, plywood and gypsum board are all common. A good adhesive lists the surfaces it works on, and does not leave you guessing.
- Pot life and open time. You need enough working time to place and adjust tiles before the material starts to skin over, especially in hot weather.
- Coverage per bag. A cheaper bag that covers less area can easily cost more per square foot. Ask for the coverage figure and the trowel size it is based on.
- Ease of use. A single-component product that only needs water saves time and removes the chance of someone adding the wrong thing on site.
- The manufacturer. Buying from a manufacturer, rather than through several middlemen, usually means fresher stock, consistent quality and someone you can actually call if there is a problem.
How much adhesive will you actually need?
This is the question most people get wrong, and it is the main reason projects run short halfway through or end with leftover bags nobody wants. The answer depends on the trowel size and the bed thickness, because both decide how much material goes under each tile.
As a working figure, one 20 kg bag of Starx 345 covers approximately 55 to 60 square feet when it is spread with a 6 mm × 6 mm square-notch trowel to a bed of about 3 mm. So if you are tiling a 200 square foot living room, you should plan for roughly four bags. A 1,000 square foot flat would need somewhere around 17 to 19 bags, depending on how even the surface is and how carefully the work is done.
Uneven floors are the usual culprit when coverage drops. If your slab has dips of more than a few millimetres, it is better to level it first with a suitable screed than to try to fill the gaps with extra adhesive. A thick bed of adhesive is expensive and defeats the whole point of using a thin-bed system.
Where Starx 345 fits in
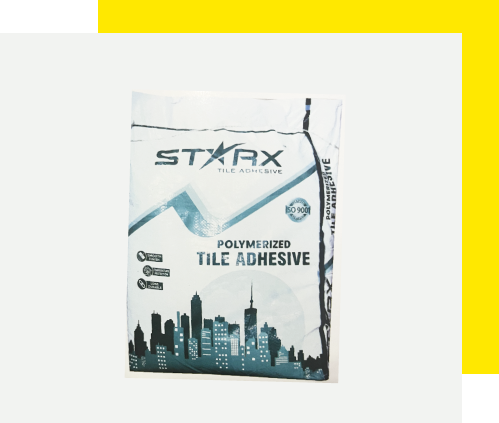
At Starx Product, we make our adhesives at our own facility in Mundka Industrial Area, and Starx 345 is the one we point most contractors toward when they need one product that can handle a range of jobs. It is a premixed, polymer-enriched blend, and the whole idea behind it is simplicity: open the bag, mix it with water, and apply it. There is no second component to measure and nothing extra to add on site.
It is designed for ceramic tiles, vitrified tiles, natural stone, quarry tiles, pavers and bricks, and it can be used on interior floors and walls, on exterior facades, and even in underwater applications. It bonds to concrete, cement plaster, brick masonry, exterior grade plywood, gypsum wall board and existing ceramic tile. It stays flexible enough to take up minor structural movement, and it is built to handle extreme weather, which matters a lot given the temperature swings we get here.
On the working side, it has a pot life of up to 45 minutes, and it should be used within about an hour of mixing. That gives you enough time to place tiles and correct alignment before it firms up. Full setting takes around 24 hours at 30°C ambient temperature. If you would like the full technical details, coverage notes and specifications in one place, you can see them on our page for Tile Adhesive in Delhi, where the complete data table is listed.
Step-by-step: how to apply tile adhesive correctly
Even the best adhesive will disappoint if the application is rushed. Here is the sequence that gives consistently good results.
- Prepare the surface. It must be clean and strong, free of dust, grease, loose particles and standing water. Sweep, scrape and wash where needed. This single step prevents more tile failures than any other.
- Mix with clean water. Add the powder to water and mix to a smooth, lump-free paste. Mix only what you can use within the hour, and do not add anything else to the bag.
- Spread an even bed. Use the flat side of the trowel to press adhesive onto the surface, then comb it with the notched side. A 6 mm × 6 mm square-notch trowel gives you the right 3 mm bed.
- Place the tiles. Press each tile firmly into the bed, with a slight twisting motion. Tap gently with a rubber mallet so the tile sits fully in contact with the adhesive and not just on the ridges.
- Check and adjust. Lift an occasional tile to see whether the back is well covered. If you spot gaps, add a little more adhesive. Adjust alignment and spacing while the material is still workable.
- Let it set. Leave the surface undisturbed for 24 hours at about 30°C. Cold, humid or windy conditions can stretch this, so do not walk on it early.
- Grout the joints. Once everything has fully set, fill the joints with a proper tile grout for a clean, finished look. Our Starx Tile Grout is made to go with this adhesive.
Common mistakes that ruin a good tiling job
After years of seeing sites of every size, the same handful of mistakes keep coming up. The good news is that they are all easy to avoid once you know about them.
Spreading too much area at once
On a hot day, adhesive starts to dry on the surface faster than you expect. If you spread a large patch and then take your time placing tiles, the first ones may land on a skin that has already stopped bonding. Work in sections you can finish within a few minutes.
Skipping the surface preparation
Dust, oil and old paint make a perfectly good adhesive behave badly. If the substrate is weak or crumbly, the adhesive will hold on to the weak layer and the whole thing will come away with it. Fix the base first.
Adding extra water to make it easier to spread
It is tempting when the mix feels stiff, but over-watering weakens the bond and increases the chance of shrinkage. Use clean water in the proportion given on the bag, and give the mix a moment to rest before you judge its consistency.
Using the wrong trowel
A trowel that is too small leaves poor coverage, and one that is too large wastes material and raises the tile. Stay with the notch size the manufacturer recommends, and check the back of a tile now and then to confirm the contact.
Grouting too early
Joints should only be filled once the adhesive has properly set. Rushing this step can disturb tiles that have not fully bonded and leave you with uneven lines.
Buying directly from the manufacturer
When you buy tile adhesive in Delhi straight from a manufacturer, you cut out layers of handling and storage that can affect the product. Cement-based powders are sensitive to moisture, and a bag that has sat in a damp godown for months will not perform like a fresh one. Dealing with the maker also means you can ask technical questions, get guidance on quantities for your specific project, and arrange bulk supply for larger sites.
Starx Product is ISO 9001 certified and supplies builders, contractors and distributors in Delhi and across India. You can reach our team on +91 93116 43257, or send us your project details through the contact page and we will help you work out the quantity you need.
Quick answers to common questions
Can I use the same adhesive on the floor and on walls?
Yes, as long as the product is rated for both. Starx 345 is meant for interior floors and walls, exterior facades and underwater use, so one product can cover most of a typical project.
Do I need special labour to apply it?
No. Ordinary tiling labour with standard tools such as a notch trowel and rubber mallet can apply it. The main thing is to follow the mixing and spreading steps carefully.
How long before I can walk on the tiles?
Plan on leaving the surface alone for about 24 hours at around 30°C. Colder or more humid weather can extend this, so be patient on winter jobs.
Final thoughts
Tiles are one of the most visible parts of any home or building, and also one of the most expensive to redo. A little care in choosing the adhesive, working out the quantity and preparing the surface goes a long way. If you want a dependable, easy-to-use option that works across floors, walls and facades, take a look at our Tile Adhesive in Delhi and talk to us about your project. We are always happy to help you get it right the first time.